SENIOR EMBEDDED SOFTWARE ENGINEER, ROBOTICIST, IOT ARCHITECT, CO-FOUNDER AND CTO BYTEHUB EMBEDDED, INVENTOR OF CLOUDX, TECH INSTRUCTOR AND EDUCATIONIST.
13 articles
December 10, 2019
I have been using Windows operating systems and bare-metal (non OS) embedded chips all my life, until recently when I developed interest in non bare-metal processor boards like Beaglebone and Odriod (Please don’t mind me, I’m not just a fan of Raspberry pi, i prefer working with the beaglebone because of their opensource license that supports using their platforms for commercial purpose). Because of my interest working with Linux Distros for programming embedded applications using ARM Cortex-A, so i decided to move completely from Windows OS to Linux. If you’re thinking of moving too I will advice you to use Ubuntu because it’s easier to install and has large community support from embedded applications. I won’t be discussing further on embedded OS because this tutorial is more focused on ARM Cortex-M microcontroller use.
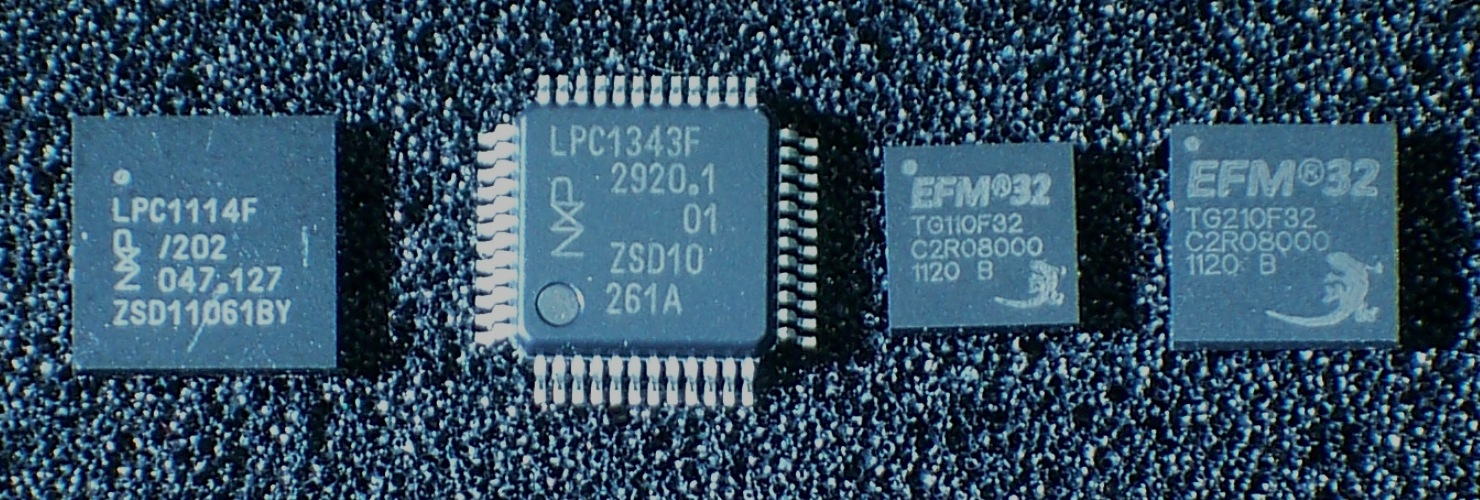
ARM Cortex-M0 and Cortex-M3 microcontroller ICs from NXP and Silicon Labs (Energy Micro)
Though there are a lot of vendors for the ARM processor and I have chosen to work with one of the most used for commercial products with large community of users. I’ve written this article to help those having challenges coding STM32 on Linux distribution without using any special IDE. Every single process from coding writing, compiling and flashing into the microcontroller is done using Bash command-line interface. Warren, who’s an author of “Beginning STM32 Developing with FreeRTOS, libopencm3 and GCC†and he’s more like a father to me in embedded linux, which i receive email advice from him at least once a week. He said-
There are a number of Windows-based IDE environments available, with varying licenses. But IDEs change, licenses change, and their associated libraries change with time. The advantage of the given IDE is often discarded when the IDE and the operating system it runs upon change.
Using a purely open sourced approach has the advantage that you are shielded from all this version churn and burn. You can mothball all of your code and your support tools, knowing that they can all be restored to operation ten years from now, if required. Restoring licensed software, on the other hand, leaves you vulnerable to expired licenses or online sites that have gone dark.
I started programming STM32 using Atollic TrueSTUDIO which wasn’t free for commercial usebut became totally free when acquired by the STMicroelectronics in 2017(unlimited code size but some few features are not still present in the Lite version) which is now used by large corporations, small- and medium-sized companies, independent developers, researchers, students and hobbyists all around the world. Though I strongly recommend using this since it’s now managed by the STM32 manufacturer. I will write my next tutorial using this software tool.
I also tried using Coocox CoIDE because it was the only free and highly-integrated software development environment for ARM Cortex MCUs though it lacks community supports and their website is no longer functioning. This tutorial is written for you not to be dependent on any IDE.
I want to believe you have a little understanding on Linux shell commands using terminal. To locate terminal on your PC, simply use the search text box.
My main reason for writing this article is because the few tutorials online that talks about coding STM32 without IDE on Linux looks so complicated and hard to understand, which means programmers will be limited to just a family of the Cortex-M.
Hardware Tools You need
PC that runs on Linux, you can decide to do dual booting, meaning using both Windows and Linux OS on your machine and I’m using Ubuntu 19.04 in this tutorial. Another method that I have tried is the new Windows -Linux app that came with Windows 10 App store feature which is called Windows Subsystem Linux (WSL), pretty easy to install and use. I would recommend using VirtualBox only if you have a good high performance PC.
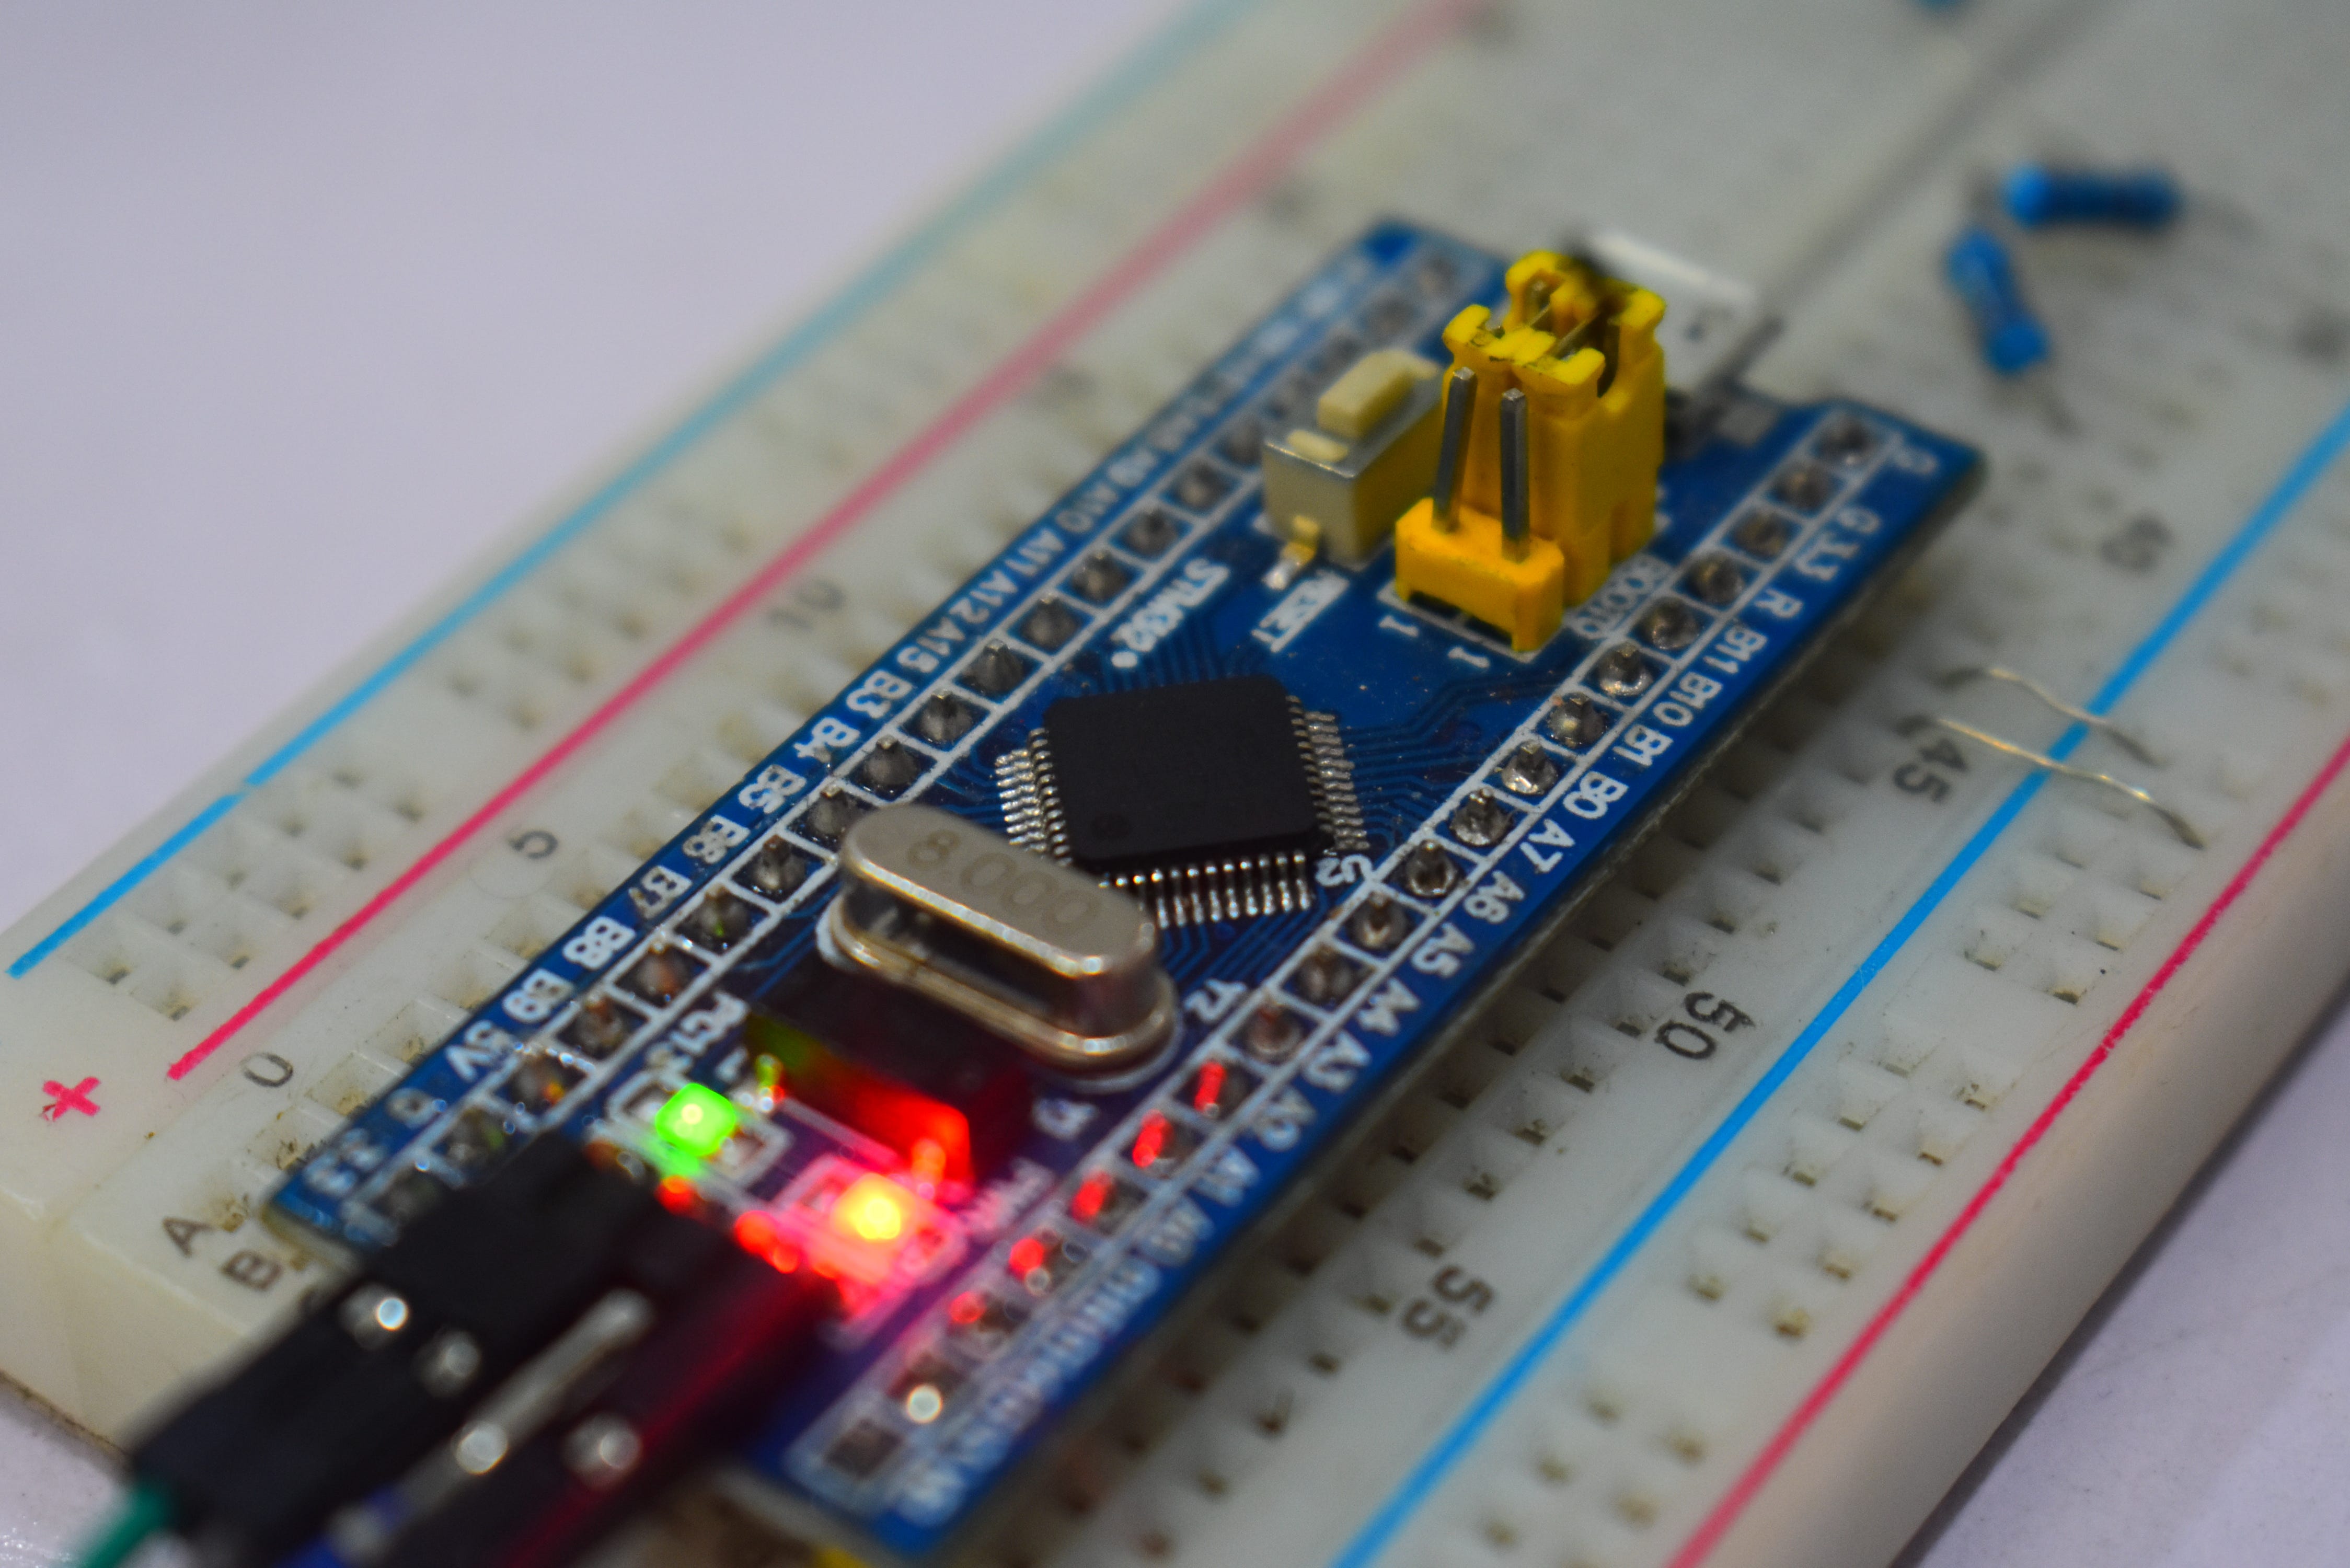
The low cost STM32F103C8T6 board. I bought mine from HUB360 Nigeria online store.
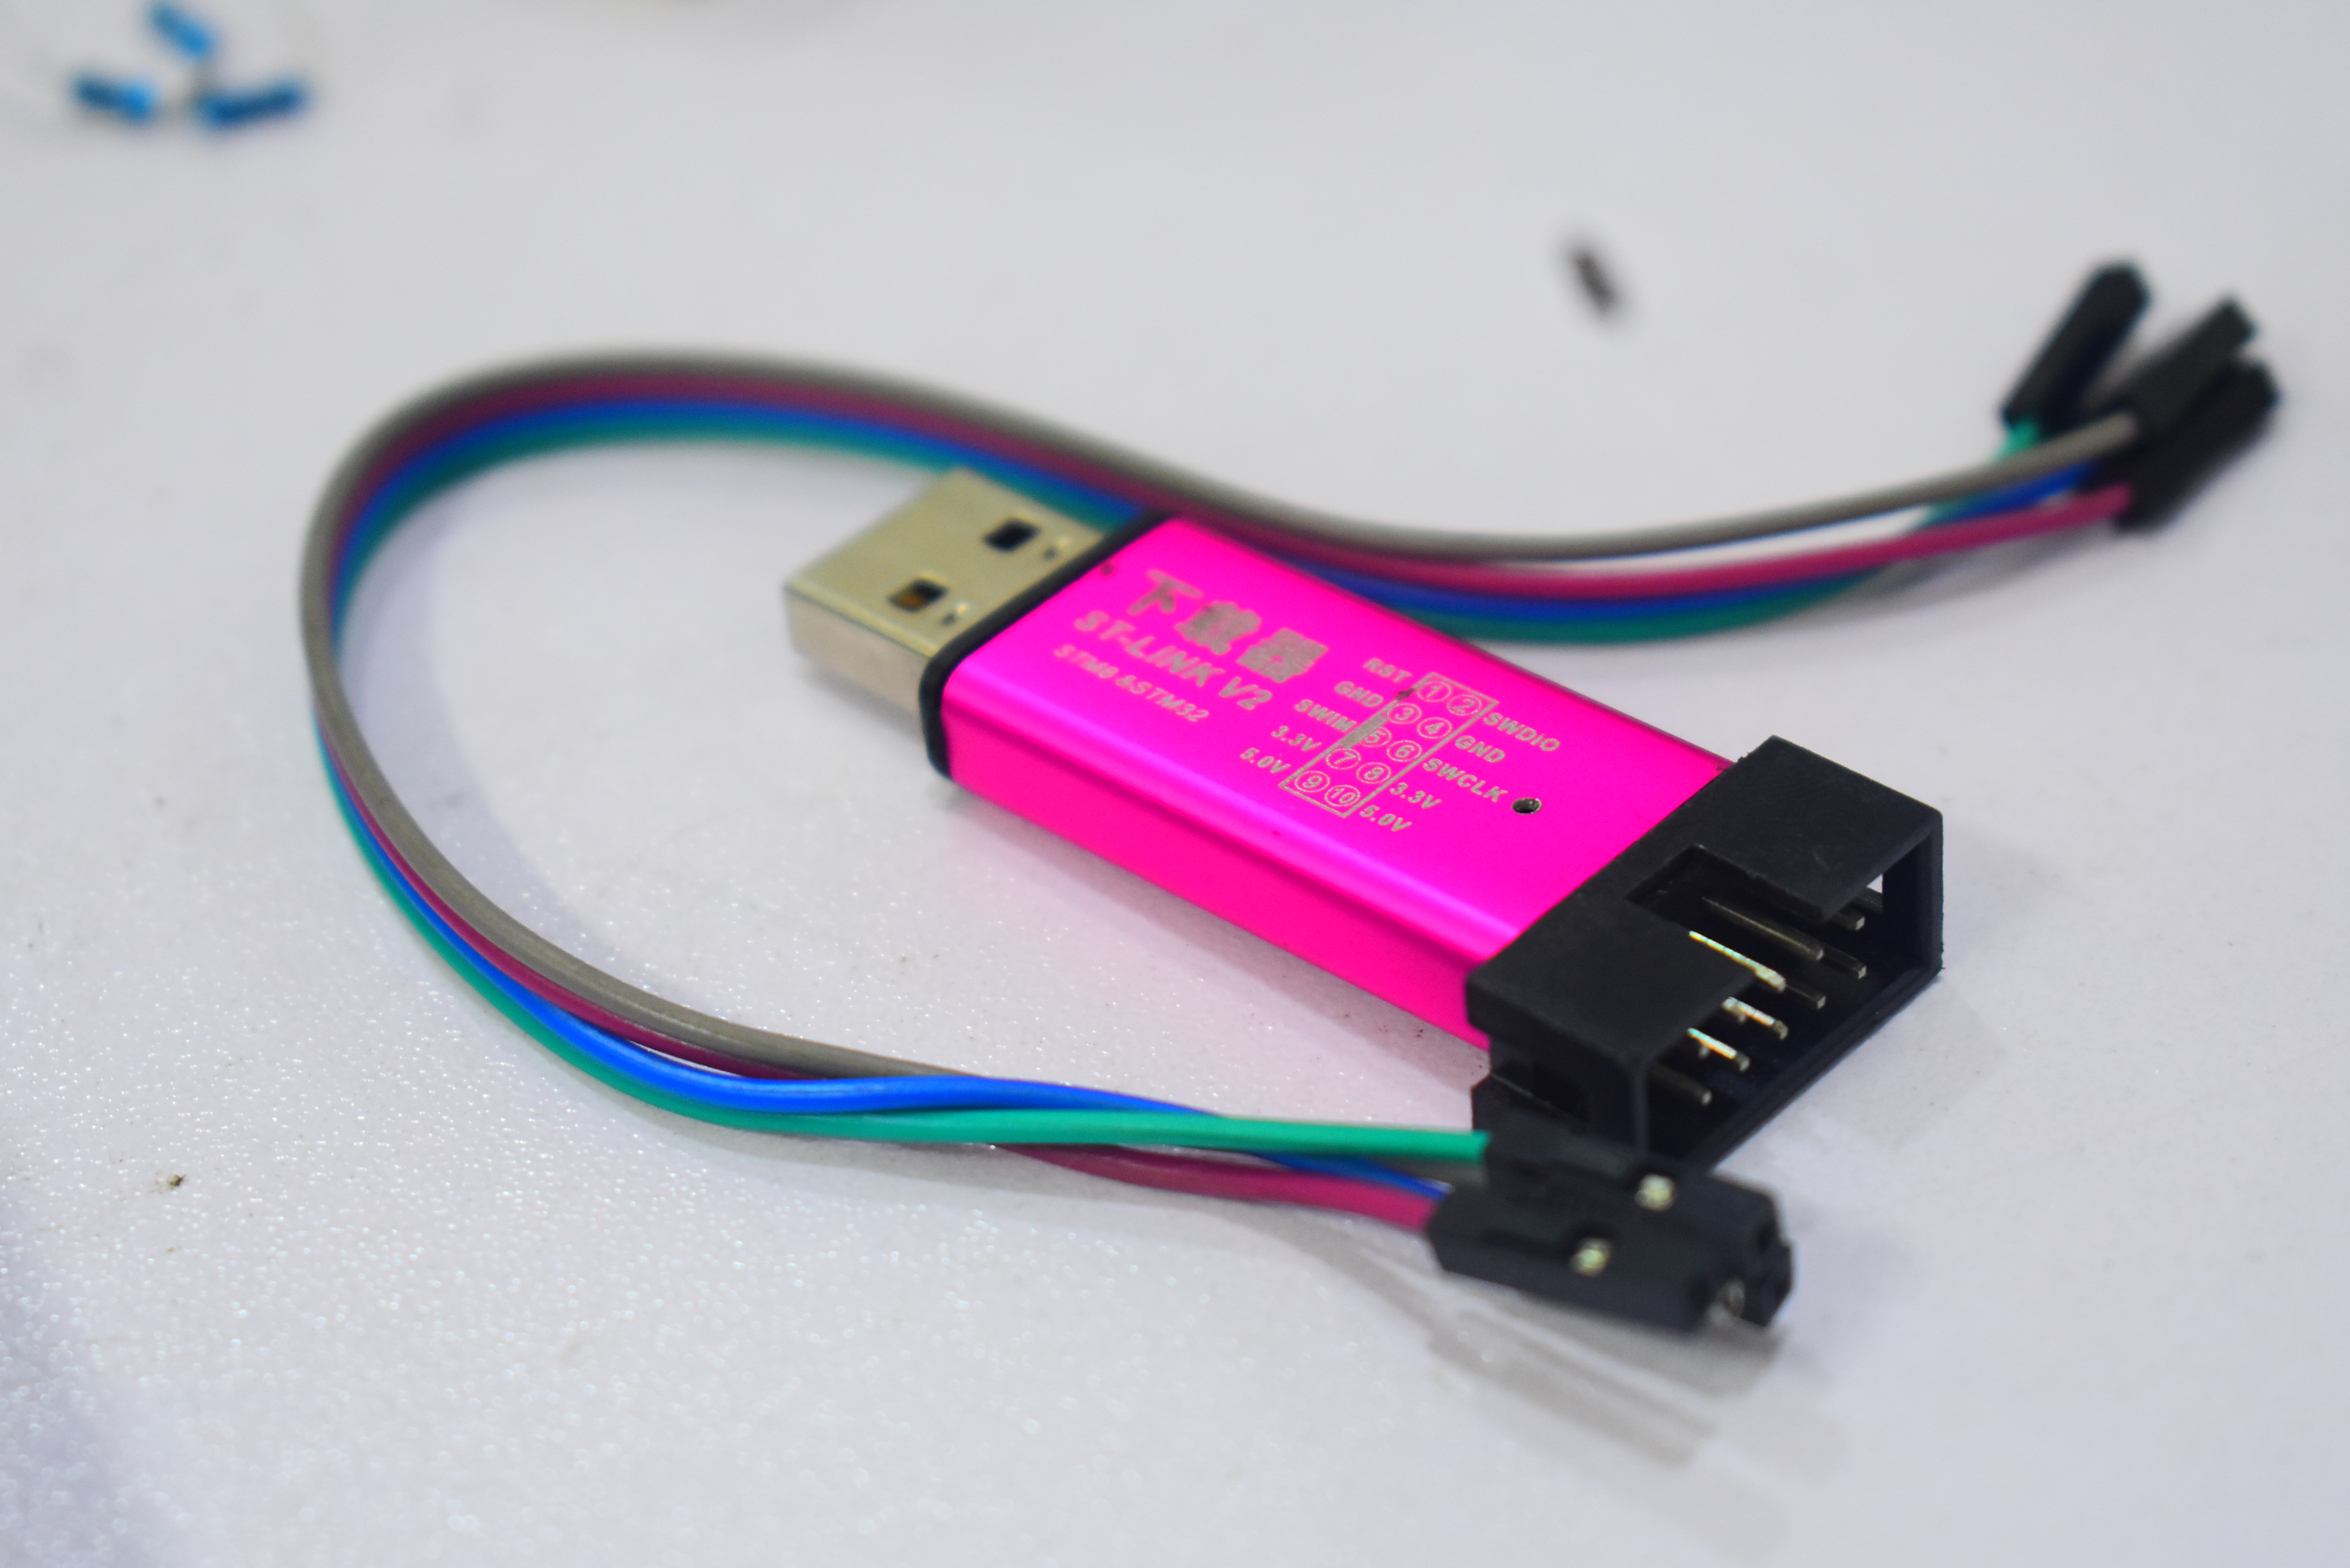
You also need the STLink with female-female connector wires for hardware programming and debugging.
STLINK V2
Low cost STM32F103C8T6
Installations
Firstly, download the ARM GNU Embedded Tool chain using the above link. I assume that the tool chain was downloaded into the Downloads folder. Open up the Linux terminal and input the following commands,
1. Make the home as current directory
$ cd
2. Change to the Downloads directory
$ cd Downloads
3. Create a system directory /opt (if you do not already have one):
$ sudo -i # mkdir /opt
4. Change to the /opt directory (as root):
# cd /opt
5. Unpack your compiler
$ tar xjf ~/Downloads/gcc-arm-none-eabi-8–2019-q3-update-linux.tar.bz2
6. Once the tar file has been extracted, it may produce a large directory name like gcc-Âarm-Ânone-eabi-8–2019-q3-update. We need to shorten the name
The next software you should install is the LibOpenCm3 library but i would strongly recommend using Warren’s template because it comes with the libopencm3 library, Makefiles and the STLink.
You will need to install git if you don’t have it, enter this command: $ sudo apt install git
Open the stm32 folder and run this command only for this first time $ git submodule update --init
3. Before proceeding, you might need to install make in the home directory if your Ubuntu doesn’t come with it. $ sudo apt install make
5. Run make inside the stm32 folder $ make
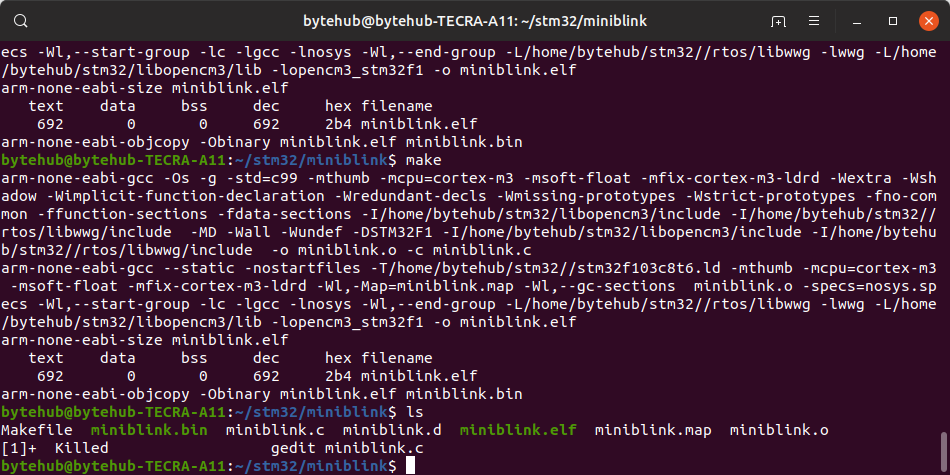
6. Open the miniblink folder inside the stm32 folder to see an example of the blinking project. You can open and edit the miniblink.c using your best text editor, i prefer gedit,Note that the editing is optional as GPIOC,GPIO13 is connected to the on-board LED on the stm32f103c8t6 board. Use the terminal to navigate to the miniblink folder and run this command $ make using command ls to the see the generated compiled files (.bin, .elf)inside miniblink folder $ ls
7. The next thing is to flash our code into the board, go to the home directory and run this command $ st-info --probe
You will have a response that looks similar to the text below, saying Flash written and verified! jolly good!
st-flash 1.5.1–31-g625f4cd 2019–08–05T11:08:38 INFO common.c: Loading device parameters…. 2019–08–05T11:08:38 INFO common.c: Device connected is: F1 Medium-density device, id 0x20036410 2019–08–05T11:08:38 INFO common.c: SRAM size: 0x5000 bytes (20 KiB), Flash: 0x10000 bytes (64 KiB) in pages of 1024 bytes 2019–08–05T11:08:38 INFO common.c: Attempting to write 692 (0x2b4) bytes to stm32 address: 134217728 (0x8000000) Flash page at addr: 0x08000000 erased 2019–08–05T11:08:38 INFO common.c: Finished erasing 1 pages of 1024 (0x400) bytes 2019–08–05T11:08:38 INFO common.c: Starting Flash write for VL/F0/F3/F1_XL core id 2019–08–05T11:08:38 INFO flash_loader.c: Successfully loaded flash loader in sram 1/1 pages written 2019–08–05T11:08:38 INFO common.c: Starting verification of write complete 2019–08–05T11:08:38 INFO common.c: Flash written and verified! jolly good!
Blinking the On-Board LED
If you want to use another family of the STM32, please drop comments so that i can show you steps.
Remember to receive Christ if you’re not saved Yet!