SENIOR EMBEDDED SOFTWARE ENGINEER, ROBOTICIST, IOT ARCHITECT, CO-FOUNDER AND CTO BYTEHUB EMBEDDED, INVENTOR OF CLOUDX, TECH INSTRUCTOR AND EDUCATIONIST.
13 articles
December 10, 2019
I wrote this article for hobbyists who are more interested in building their own project using the cloudx microcontroller chip PIC16F877A instead of buying the complete board from the manufacturer. One of the main reason you may want to build your own board is probably to minimize board size, you prefer using the microcontroller chip around your own project circuit. In order to make your PIC16F877A work as cloudx you will need to bootload it or buy the bootloaded PIC16F877A chip from the manufacturer which is quite very cheap. The tutorial steps below is meant for you if you have decided to bootload it by yourself.


CloudX M633 and PIC16F877A microcontroller
Bootloading your PIC16F877A as M633
The reason why we are using the PIC16F877A in this tutorial is because that’s the chip used on the cloudx M633 board. we will have to download the cloudx M633 Bootloader here or go to cloudx.ng, the official download page.

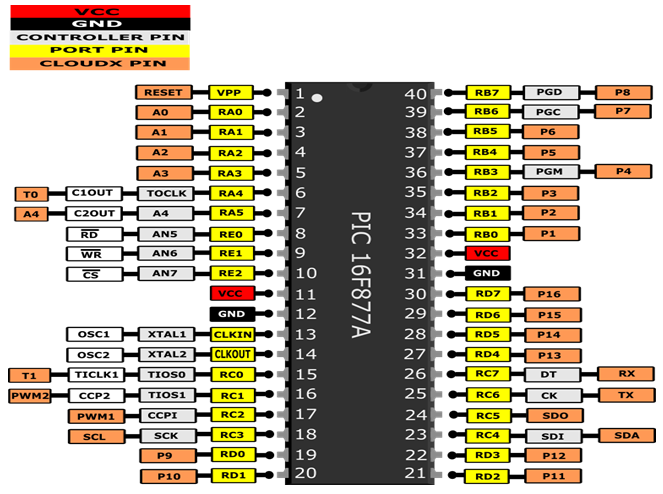
CloudX M633 PIC16F877A Pinouts
Once you are done with the downloading, you will need to upload the bootloader hex file into the PIC16F877A using PIC hardware programmer like the PICKIT2, PICKIT3 or any other PIC programmer that you have. I used the PICKIT3 in my own to upload the bootloader file into the chip.

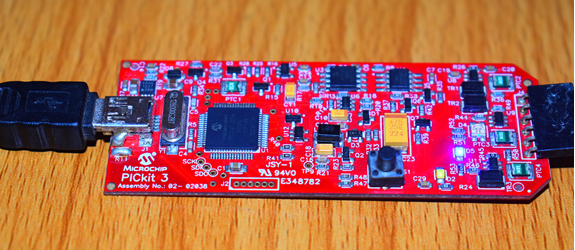
PICKIT3 For bootloading CloudX for PIC16F877A
Programming your microcontroller using pickit3 requires you to know important pins on the microcontroller that you are using. those pins are VPP or MCLR, VCC, GND, DATA, CLK. if you don’t understand any of this then you can order for the PICKIT2 or PICKIT3 PCB designed ZIF socket from cloudx.ng or HUB360 store.

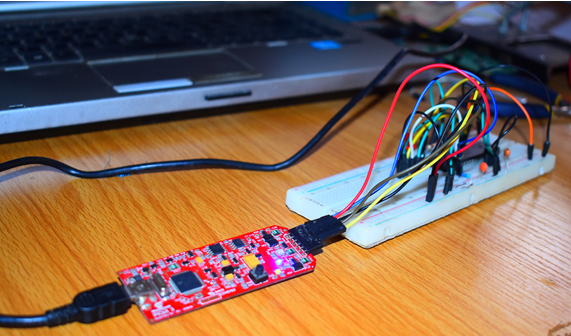
Bootloading the Chip
Understanding the M633 Schematics
In order to use the cloudx libraries, you will need to understand the schematics, it allows you to know the pinouts and how to wire your circuit directly from the PIC16F877A chip without any mistake.

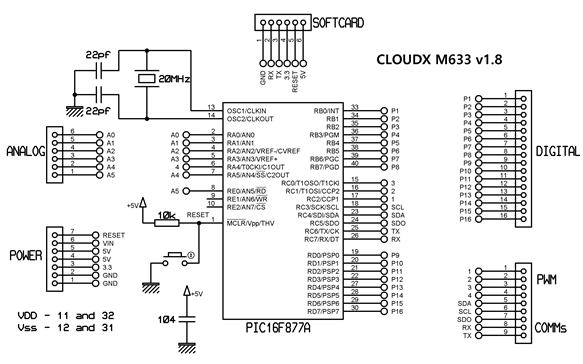
CloudX M633 Schematics
Designing your circuit
Since you are building a customized cloudx board, you don’t need to insert the header sockets, just connect the microcontroller directly to your circuits. the example circuit that i have designed on my board is to blink an LED connected to pin21 of the PIC16F877A chip which is the P11 when using the cloudx environment.

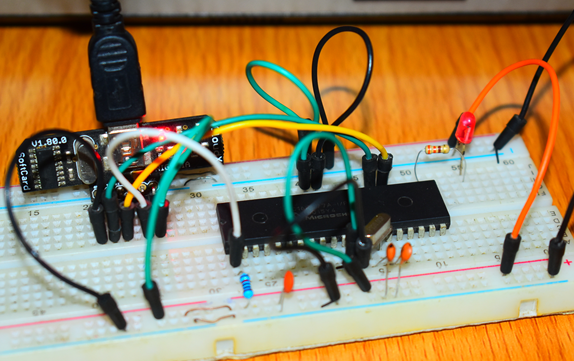
Loading Your compiled code through the softcard.
Finally, you can now write your code , compile with the cloudx IDE and upload it into the microcontroller through the softcard or any USB — TTL chip.
Downloads
If you are downloading this for the first time, please download the user’s guide file below and read how to completely install the cloudx. To use and understand the cloudx library, read the documentation file. To be able to simulate your cloudx on proteus, download the CloudX Proteus Library.
Published by
SENIOR EMBEDDED SOFTWARE ENGINEER, ROBOTICIST, IOT ARCHITECT, CO-FOUNDER AND CTO BYTEHUB EMBEDDED, INVENTOR OF CLOUDX, TECH INSTRUCTOR AND EDUCATIONIST.
13 articles
December 10, 2019
Reactions